With this relative heat wave we have been experiencing so early this summer, I wanted to whip up something cool and delicious for dinner. This Gazpacho has a slight Latin twist with the roasted corn and chili powder flavors. If you like tomatoes you are sure to love this cold soup. It only gets better the longer the ingredients meld in the fridge, if you are lucky enough to have leftovers that is!
Mexican Gazpacho
4 large ears of Corn On The Cob, Sweet
1 large Yellow Bell Pepper
1 large Green Bell Pepper
1 large Red Bell Pepper
1 loaf Artisan French Bread
20 oz Canned Tomatoes, Petite Diced
20 oz Canned Tomato Sauce
1 cup Button Mushrooms
1 medium Onion, Sweet
3 cloves Fresh Garlic
2 tsp Ground Cumin
1 tbsp Chili Powder
1 cup Vegetable Stock (natural, Cooking)
3 tbsp Balsamic Vinegar
7 tbsp Extra Virgin Olive Oil
Start with the Corn on the Cob:
Pre-heat the oven to 450 degrees. Husk each ear, being sure to remove all of the silk as well. Place the ears in a baking dish and coat with 2 Tbsp of the Olive Oil. season the ears with a little of the Cumin and Chili Powder and Salt and Pepper to taste.
Roast in the oven for 15 - 20 minutes until the ears are fork tender. Pull the ears out and let cool.
Meanwhile char the Bell Peppers. This can be done directly over a low flame of a gas stove. Keep rotating the peppers with tongs until most of their skins have blackened and the flesh is partly cooked through. When the skins are almost completely charred, remove the peppers to a large bowl and cover with plastic wrap. Allow the peppers to rest in the covered bowl for 10 - 15 minutes. The steam released by the charred peppers will help soften the skins.
Slice the French Break into thick slices (8 - 10) Place on a baking sheet, and drizzle with some of the Olive Oil. Toast in the hot oven after the corn has come out, up to 5 minutes. Be careful not to burn the bread!
Open the cans of Tomatoes and pour into a large bowl. Dice the Mushrooms, and Onions and drop into the bowl. Grate in 2 cloves of the garlic, saving on clove for the toast.
When the Corn is cool enough to touch slice off the kernels. A good trick is to place a small bowl upside down inside of a larger bowl. Use the small bowl as a platform for the cob and carefully slice off the kernels into the large bowl. Dump them into the tomato mixture in the large bowl.
When the peppers have rested remove from the bowl. The charred skin will be soft enough to remove with a kitchen towel. Just rub the skins off. Cut the flesh away from the cores, remove any seed and dice. Add the diced peppers to the tomato mixture.
Stir everything together - season with the remaining Cumin, Chili Powder, Balsamic Vinegar, and 2 Tbsp of the Olive Oil. If the mixture is to thick, thin with 1/2 - 1 cup of the vegetable stock.
To finish the toast, rub the last garlic clove over each slice of the toasted bread.
Allow the soup to chill. Serve with a slice of garlic toast and enjoy!
Tuesday, June 29, 2010

Tuesday, June 15, 2010
Domestic House of Waffles
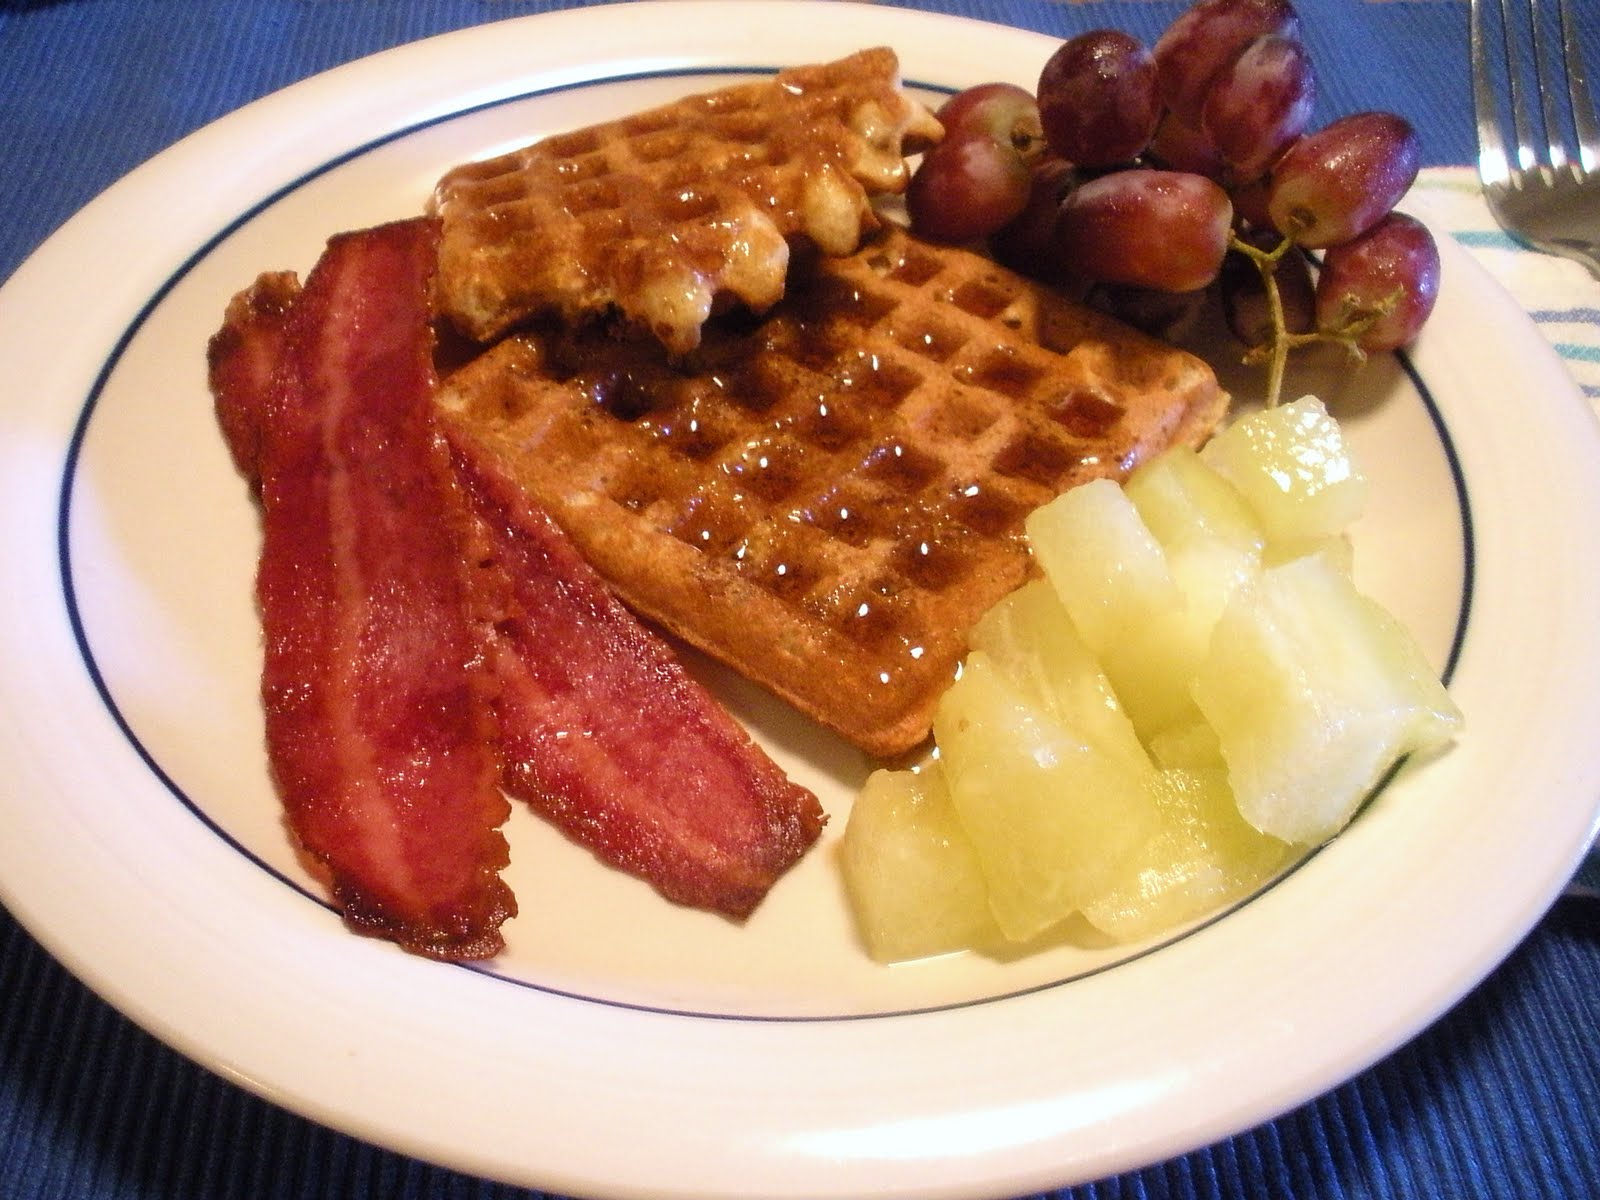
One thing I miss about not living at home, is the big Sunday breakfasts we used to have after church.
There was usually eggs, bacon or sausage, toast, potatoes, steamed onion, maybe some pancakes or french toast, fruit, and if we were lucky, cinnamon buns. Yummm. This was the kind of meal that lead to early afternoon naps before the sports began on T.V.
In that frame of mind I decided to make some waffles, from scratch of course!
Whole Wheat Waffles
1 cup Whole Wheat Flour
3/4 cup All Purpose Flour
1 tbsp Baking Powder
1 tbsp Sugar
1/2 tsp Salt
3 Eggs
1/4 c to 1 cup Butter, melted
1 1/2 cups Milk
Preheat your waffle iron.
Whisk flours, baking powder, sugar and salt together in a large bowl.
Blend the eggs, melted butter and milk thoroughly in another bowl. For a lighter waffle use only 4 tbsp of butter (1/2 stick). To make an extra crispy waffle go for all of the 1 cup of butter (2 sticks). For a good in between waffle stick to the 1/2 cup amount (1 stick).
Make a well in the center of the dry ingredients and pour in the wet ingredients. Combine with a few quick strokes of the whisk. Don't over mix the batter or your waffles will come out tough.
If you want to add any additions (like fruit, chocolate chips, etc) now would be the time.
To cook, pour about a 1/2 cup to 1 cup of batter onto the center of the bottom plate of the iron, so that its about 2/3 covered. There's no need to grease the iron because of all of the butter in the batter.
Close up the iron and watch and wait. Let the waffle cook for about 4 minutes. The waffle will be ready when the steam stops escaping from the side of the iron. If the iron seams difficult to open, the waffle probably isn't quite ready, let it cook for a minute more and try again.
Serve warm with some maple syrup for a traditional breakfast treat.

Left overs can be frozen individually in a freezer bag and thawed later for a quick treat. I like to put the frozen waffles directly into the toaster, then slather them with peanut-butter and jelly for a breakfast sandwich on the go.
Wednesday, April 7, 2010
Spring Salads and Balsamic Vinegar
I've noticed that all winter, I've been making a lot of soup, but now that the weather is warming up, I've been craving some greens to with them.
Here are a few salad recipes I've come up with lately to keep things fresh and vibrant.
As to the apparent balsamic theme, I happen to like the thick sweetness of it, as opposed to the tartness of other vinegars, like cider vinegar.
Balsamic Bean and Tomato Salad
A simple, yet tasty salad, from standard pantry items
1 cup Low Sodium Pink Beans
1 cup white beans, canned
1 cup Canned Diced Tomatoes No Salt Added *
1/2 cup Onions, Diced
1/2 cup Sliced Mushrooms
4 tbsp Balsamic Vinegar
2 serving Extra Virgin Olive Oil
Salt and Pepper, To taste
Drain the canned beans and rinse well; pour into your Salad bowl.
Drain diced tomatoes and add to the beans.
Dice up onion, slice the (rinsed) mushrooms, and add to the bean mixture.
Drizzle in Balsamic Vinegar, a few turns around the bowl, about 4 Tbsp. Drizzle in a little less of the EVOO (Extra Virgin Olive Oil), about 2 Tbsp.
Sprinkle in some salt and cracked black pepper to taste.
Mix well and allow to chill in the fridge before eating.
*NB When summer does finally come around, I will likely be making this with fresh tomatoes instead of canned. In this case 1 large or 2 medium ripe tomatoes will be substituted. Just seed and dice them and add to the beans.
Balsamic Cobb Salad with Herbs
Spring greens with herbs dressed in a balsamic vinaigrette.
• 2 clove Garlic Clove
• Salt and Pepper to taste
• 2 tbsp Balsamic Vinegar
• 1 tbsp Dijon Mustard
• 1 tbsp Honey
• 4 tbsp Extra Virgin Olive Oil
• 1/2 cup Carrots
• 1/2 cup Cucumber
• 1/4 cup Onion, Sweet
• 3 large egg Hard-boiled Egg
• 1 cup Smoked Ham
• 6 cup Organic Spring Mix, with herbs
• 4 tbsp Parmesan Cheese
Start by making the vinaigrette in the bottom of your salad bowl.
Mince the garlic and add to the bowl. Add some salt and pepper to taste. Pour in the balsamic vinegar, mustard and honey. The mustard will help stabilize the vinegar and oil when you whisk them together and the honey balances out the tartness in the vinegar.
Whisk the ingredients together. When well combined, slowly drizzle in the oil, while whisking to create an emulsification.
Check the taste and adjust the vinaigrette as needed. It should be tart and slightly sweet.
Next assemble your salad.
Wash all vegetables first. Peel and slice the carrot and cucumber, dice the onion, peel and slice the eggs, slice the ham into strips. Toss everything into the vinaigrette. Double check the spring greens are clean and add those as well. The variety I found at the store had herbs as well as greens, which added fresh doses of flavor to each bite. You can add your own to the mix; try dill, arugula, and parsley.
Toss everything together and serve. This would make a good side, or lunch salad, or could even stand alone as an entrée salad with rolls or bread on the side.
You may want to garnish each bowl with a sprinkle of Parmesan cheese.
Here are a few salad recipes I've come up with lately to keep things fresh and vibrant.
As to the apparent balsamic theme, I happen to like the thick sweetness of it, as opposed to the tartness of other vinegars, like cider vinegar.
Balsamic Bean and Tomato Salad
A simple, yet tasty salad, from standard pantry items
1 cup Low Sodium Pink Beans
1 cup white beans, canned
1 cup Canned Diced Tomatoes No Salt Added *
1/2 cup Onions, Diced
1/2 cup Sliced Mushrooms
4 tbsp Balsamic Vinegar
2 serving Extra Virgin Olive Oil
Salt and Pepper, To taste
Drain the canned beans and rinse well; pour into your Salad bowl.
Drain diced tomatoes and add to the beans.
Dice up onion, slice the (rinsed) mushrooms, and add to the bean mixture.
Drizzle in Balsamic Vinegar, a few turns around the bowl, about 4 Tbsp. Drizzle in a little less of the EVOO (Extra Virgin Olive Oil), about 2 Tbsp.
Sprinkle in some salt and cracked black pepper to taste.
Mix well and allow to chill in the fridge before eating.
*NB When summer does finally come around, I will likely be making this with fresh tomatoes instead of canned. In this case 1 large or 2 medium ripe tomatoes will be substituted. Just seed and dice them and add to the beans.
Balsamic Cobb Salad with Herbs
Spring greens with herbs dressed in a balsamic vinaigrette.
• 2 clove Garlic Clove
• Salt and Pepper to taste
• 2 tbsp Balsamic Vinegar
• 1 tbsp Dijon Mustard
• 1 tbsp Honey
• 4 tbsp Extra Virgin Olive Oil
• 1/2 cup Carrots
• 1/2 cup Cucumber
• 1/4 cup Onion, Sweet
• 3 large egg Hard-boiled Egg
• 1 cup Smoked Ham
• 6 cup Organic Spring Mix, with herbs
• 4 tbsp Parmesan Cheese
Start by making the vinaigrette in the bottom of your salad bowl.
Mince the garlic and add to the bowl. Add some salt and pepper to taste. Pour in the balsamic vinegar, mustard and honey. The mustard will help stabilize the vinegar and oil when you whisk them together and the honey balances out the tartness in the vinegar.
Whisk the ingredients together. When well combined, slowly drizzle in the oil, while whisking to create an emulsification.
Check the taste and adjust the vinaigrette as needed. It should be tart and slightly sweet.
Next assemble your salad.
Wash all vegetables first. Peel and slice the carrot and cucumber, dice the onion, peel and slice the eggs, slice the ham into strips. Toss everything into the vinaigrette. Double check the spring greens are clean and add those as well. The variety I found at the store had herbs as well as greens, which added fresh doses of flavor to each bite. You can add your own to the mix; try dill, arugula, and parsley.
Toss everything together and serve. This would make a good side, or lunch salad, or could even stand alone as an entrée salad with rolls or bread on the side.
You may want to garnish each bowl with a sprinkle of Parmesan cheese.
Tuesday, February 9, 2010
Cauliflower Soup
Every once in a while, while grocery shopping, I'll see something that catches my eye. A few weeks ago it was cauliflower. Ok, the sign caught my eye not so much the produce, but who can resist a good sale.
After I brought my unintended prize home for the store I researched a few recipes in my Joy of Cooking and debated. Mashed Cauliflower? Scalloped or Souffle? I settled on the Cream of Cauliflower soup recipe; simple and delicious.

Cream of Cauliflower Soup
4 T butter (1/2 stick)
1 1/2 c minced celery
1 c chopped onions
1 1/2 pounds cauliflower (about 1 head), trimmed and coarsely chopped
1/4 c AP flour
4 c chicken stock or broth (boxed is fine)
1/2 - 1 c heavy cream, half and half, or milk (whatever you have on hand)
pinch of grated or ground nutmeg
salt and pepper to taste
grated cheese for garnish.
Melt the butter in the bottom of your soup pot. Add and cook the celery and onion until tender and translucent, but not browned. Stir in the chopped cauliflower. An easy way to break down the cauliflower head is to cut the whole thing into quarters. Remove any extra leaves remaining on the outside. Remove the core by slicing into the bottom of each quarter at an angle. Then just cut the florets away from each other and cut those into bite size pieces.
Cover and cook for 5 minutes, stirring occasionally. Stir in the flour (making a roux around all those veggies) Turn the heat to high. Slowly stir in the chicken stock.
Reduce heat to medium low and simmer, partially covered, until the cauliflower is very tender, about 25 minutes, stirring occasionally.
Using a food processor or blender, process half the soup until smooth. Return to pot and stir in cream or milk. Heat through but do not boil.
Add nutmeg, salt and pepper, to taste.
Serve garnished with grated cheese such as Cheddar or Swiss.
After I brought my unintended prize home for the store I researched a few recipes in my Joy of Cooking and debated. Mashed Cauliflower? Scalloped or Souffle? I settled on the Cream of Cauliflower soup recipe; simple and delicious.

Cream of Cauliflower Soup
4 T butter (1/2 stick)
1 1/2 c minced celery
1 c chopped onions
1 1/2 pounds cauliflower (about 1 head), trimmed and coarsely chopped
1/4 c AP flour
4 c chicken stock or broth (boxed is fine)
1/2 - 1 c heavy cream, half and half, or milk (whatever you have on hand)
pinch of grated or ground nutmeg
salt and pepper to taste
grated cheese for garnish.
Melt the butter in the bottom of your soup pot. Add and cook the celery and onion until tender and translucent, but not browned. Stir in the chopped cauliflower. An easy way to break down the cauliflower head is to cut the whole thing into quarters. Remove any extra leaves remaining on the outside. Remove the core by slicing into the bottom of each quarter at an angle. Then just cut the florets away from each other and cut those into bite size pieces.
Cover and cook for 5 minutes, stirring occasionally. Stir in the flour (making a roux around all those veggies) Turn the heat to high. Slowly stir in the chicken stock.
Reduce heat to medium low and simmer, partially covered, until the cauliflower is very tender, about 25 minutes, stirring occasionally.
Using a food processor or blender, process half the soup until smooth. Return to pot and stir in cream or milk. Heat through but do not boil.
Add nutmeg, salt and pepper, to taste.
Serve garnished with grated cheese such as Cheddar or Swiss.
Monday, January 18, 2010
Steak House Dinner, Homemade

Starting the new year on the right foot for me, often means cleaning up. Putting away Christmas gifts and decorations, getting rid of clutter, and cleaning out the fridge. It just feels good to have a fresh clean start.So what to do with those mushrooms I bought for the chili, and forgot to add? Saute them of course. What goes well with mushrooms? Beef, or more specifically filet mignon. What side would turn those two into the most awesome dinner? Double stuffed potatoes.Thus was the thought process for my Steak House style dinner; more or less. I happened to have everything I needed on hand, from the pantry or the freezer. I chose to make pepper crusted steaks so I could try out my new pepper mill.
This dinner was an exercise in time management. Start roasting the potato(es) in the oven, then work on prepping your dishes.
Twice Baked Potatoes
Preheat the oven to 400* F. Scrub your potato(es) and pierce with a fork all over. You are going to want about one per person, or one large potato can be split into two servings. Place it/them in the oven, straight on the rack and allow to bake 40 - 50 minutes or until tender. Potatoes can be roasted in their own skin; wrapping them in foil retains to much moisture.If you want a roasted garlic flavor in the mash you will be making later, place a few cloves unpeeled garlic(per potato) in a foil packet, drizzle with EVOO, wrap tightly, and bake in the oven along side the potatoes. When the potatoes are done, you can take out the garlic packet. Inside you will find that the cloves have turned into little aromatic gobs that can be squeezed out of their peel like paste.When the potatoes are fork tender, remove from the oven and allow them to cool enough for handling. Slice each one in half length wise, and using a fork or spoon, scoop out the interior into a bowl, leaving a 1/2-inch shell. Mix in butter, milk, sour cream, salt and pepper, or whatever you would normally put in mashed potatoes, to taste. Fill the shells with the mixture and top with broccoli and cheese. Pop them back in the oven, until the cheese has melted.

Pepper Crusted Steak
These are nothing more than properly seared steaks that are first coated with lots of freshly cracked black pepper and salt to taste.Start with room temperature steaks; Filet Mignon are my favorite, but this is good with other cuts as well.
Sprinkle a bit of salt on both sides, then cover with freshly cracked black pepper, lots of black pepper. Press the pepper into the meat to make a nice crust. Allow the steaks to rest for a moment to allow for what is essentially a rub, to marinate. Meanwhile heat up a heavy bottom skillet on the oven with a small amount of vegetable oil. It needs to be screaming hot with the oil just smoking. (Make sure the vent fan is on.) Place the steaks into the skillet and allow the first side to sear for at least four minutes before you even think about moving them. They have to be still to allow the pepper crust to adhere and the meat to caramelize. Once the sear has been achieved, flip the steaks and repeat on side two. This will usually result in rare steak; to cook further, place the skillet into the hot oven 3-5 minutes. If you are unsure if the handle of your skillet is oven proof, wrap it in a layer of aluminum foil. Pull the steaks out of the pan and allow to rest before cutting into them. Remember that residual heat will continue to cook the steaks, so pull them just before you think they look or feel done.
Sauteed Mushrooms in Cream Sauce
1 pint container of mushrooms (brown or white button mushrooms are good)
2 T flour
2 T butter
stock (beef or chicken)
milk
Salt and Pepper to taste
Start by rinsing off the mushrooms and patting them dry with in a towel. Heat up a small amount of EVOO in your saute pan, the slice those mushrooms. When the pan is hot, add the mushroom slices and allow to cook for 7 - 10 minutes or until browned. DO NOT salt them yet! The salt will draw out the water in them and they will stew in their juices rather than brown. Also it is best not to over crowd the pan. When the mushroom slices are brown, make a well in the middle, and melt in the butter. Sprinkle in the flour and stir and cook to form a roux. Pour in about a cup of stock and a cup of milk and allow the roux to work it's magic and thicken the sauce, over low heat, until the sauce can cover the back of a spoon. Now you can add salt and pepper to taste.
Thursday, January 14, 2010
Baby its cold outside.
Since a picture is worth a thousand words, I've been working diligently to take more pictures of the food I've been making. Since I am a little bit absent minded, its been some time since I've actually did anything with them.

First off there is the chili I made for New Years Eve. I made it for a friend's party last year and decided to make the NYE Chili a tradition. My chili is never the same anytime I make it, as I put in whatever is looking good in the produce section when I shop. I do try to stick to a loose guideline:
Onion, garlic, (carrot, celery), green onions, green, red, orange and yellow bell peppers, canned beans, no salt added diced tomatoes, (jalapeno pepper), steak, and sometimes mushrooms.
Nothing fancy, I just like it colorful; the prettier, the better. As for seasonings, simple salt and pepper, a little bit of chili powder, and cumin to make it smokey. I add each to taste.
The method is usually a chop and drop operation, starting with some EVOO in the bottom of a heavy bottomed pot on medium heat. Slow cooking veggies go in first and everything is diced. Once the veggies are in and have softened a bit, in goes the canned beans and the diced tomatoes. I use a variety of beans for even more colors; red kidney, pink beans, white beans, black beans. Drain the beans before you add them. Tomatoes go in with their juices, usually two to three cans. Then add enough stock (chicken or vegetable) to cover. From here you can season and simmer until you are ready to serve. I will often transfer the veggies to the crock pot before adding the beans, tomatoes, and stock, and let it simmer there for several hours.
If I do add meat, it will always be steak. Leftovers are fine, or broil a cut or two before you cut it into bite size pieces and add to the chili. I find that ground beef gets lost in all chaos. Chunks of meat do not.
I serve my chili over pasta, and top with shredded cheese and sour cream.

First off there is the chili I made for New Years Eve. I made it for a friend's party last year and decided to make the NYE Chili a tradition. My chili is never the same anytime I make it, as I put in whatever is looking good in the produce section when I shop. I do try to stick to a loose guideline:
Onion, garlic, (carrot, celery), green onions, green, red, orange and yellow bell peppers, canned beans, no salt added diced tomatoes, (jalapeno pepper), steak, and sometimes mushrooms.
Nothing fancy, I just like it colorful; the prettier, the better. As for seasonings, simple salt and pepper, a little bit of chili powder, and cumin to make it smokey. I add each to taste.
The method is usually a chop and drop operation, starting with some EVOO in the bottom of a heavy bottomed pot on medium heat. Slow cooking veggies go in first and everything is diced. Once the veggies are in and have softened a bit, in goes the canned beans and the diced tomatoes. I use a variety of beans for even more colors; red kidney, pink beans, white beans, black beans. Drain the beans before you add them. Tomatoes go in with their juices, usually two to three cans. Then add enough stock (chicken or vegetable) to cover. From here you can season and simmer until you are ready to serve. I will often transfer the veggies to the crock pot before adding the beans, tomatoes, and stock, and let it simmer there for several hours.
If I do add meat, it will always be steak. Leftovers are fine, or broil a cut or two before you cut it into bite size pieces and add to the chili. I find that ground beef gets lost in all chaos. Chunks of meat do not.
I serve my chili over pasta, and top with shredded cheese and sour cream.
New Year, New Decade
I've been up to many things since my last post. Thanksgiving, working retail during the holidays, and lots of cooking. I have quite a bit of catching up to do.
Thankfully my schedule has somewhat leveled out and I can start doing some regular updates, which is good, since I've been inspired to make so many things!
Of course with the turn of a new year comes resolutions and vows to lose weight and become fit. With this in mind I've picked up some books from the library and started to re-read some of my own books; "Deceptively Delicious" by Jessica Seinfeld.
Jessica's book totes the ease of hiding vegetables in food for picky eaters via vegetable purees. It's an interesting idea, and not necessarily time consuming, I recently found out when I used up some odd carrots and put them to good use in a Peanut Butter and Jelly Muffin recipe.
 For most of the purees you can steam or roast your chosen vegetable, or fruit, until tender, then puree them in a processor, blender, or whatever you happen to have in the cupboard. The purees can then be stored in small plastic containers or bags and either refrigerated or frozen for later use. The book gives advice for specific fruits and veggies, as well as nutritional break downs for each type used.
The recipes themselves are organized by type, breakfast, mealtime, and desert, and list the possible purees at the top of the page. The photos are simple and colorful, and the directions are easy to follow.
I did a slight bit of editing when I made the muffins; using butter instead of margarine, and a whole egg, instead of just the white. They still came out well and were amazing warm out of the oven with milk. It took me back to grade school.
The only complaint was from a few days latter: I took some of my muffins home for a taste test and the verdict was that they were good, but a little dry. Oh well, you can't win 'em all.
Peanut Butter and Jelly Muffins
makes 12 regular muffins, or 24 mini-muffins
You will need:
non-stick cooking spray
1/2 c creamy peanut butter
1/2 c carrot puree (You could prob substitute applesauce here)
1/2 c firmly packed brown sugar
2 T butter or margarine
1/2 c nonfat plain yogurt
1 large egg
1 c all-purpose flour
1 t baking powder
1 t baking soda
1/2 t salt
1/2 c jelly or preserves (grape, strawberry, etc)
1. Preheat the oven to 350*. Coat a 12 cup muffin tin w/ cooking spray, or line w/ paper cups
2. In a large bowl, beat the peanut butter, carrot puree, sugar, and margarine/butter with a sturdy spoon until well combined. Stir in the yogurt and egg.
3. Add the flour, baking powder, soda, and salt. Stir until just combined, but do not over mix - there should be some lumps in the batter.
4. Divide the batter among the muffin cups and drop a spoonful of preserves or jelly on top of each.
5. Bake until the tops of the muffins are lightly browned and a toothpick comes out clean when inserted in the center, 20 - 25 minutes. Turn the muffins out onto a rack to cool.
6. Store in an airtight container at room temp. for up to 2 days, or wrap individually and freeze for up to 1 month.
From "Deceptively Delicious" by Jessica Seinfeld.
* I put my muffin mold on a tinfoil lined baking sheet to catch any drips.
Thankfully my schedule has somewhat leveled out and I can start doing some regular updates, which is good, since I've been inspired to make so many things!
Of course with the turn of a new year comes resolutions and vows to lose weight and become fit. With this in mind I've picked up some books from the library and started to re-read some of my own books; "Deceptively Delicious" by Jessica Seinfeld.
Jessica's book totes the ease of hiding vegetables in food for picky eaters via vegetable purees. It's an interesting idea, and not necessarily time consuming, I recently found out when I used up some odd carrots and put them to good use in a Peanut Butter and Jelly Muffin recipe.
 For most of the purees you can steam or roast your chosen vegetable, or fruit, until tender, then puree them in a processor, blender, or whatever you happen to have in the cupboard. The purees can then be stored in small plastic containers or bags and either refrigerated or frozen for later use. The book gives advice for specific fruits and veggies, as well as nutritional break downs for each type used.
The recipes themselves are organized by type, breakfast, mealtime, and desert, and list the possible purees at the top of the page. The photos are simple and colorful, and the directions are easy to follow.
I did a slight bit of editing when I made the muffins; using butter instead of margarine, and a whole egg, instead of just the white. They still came out well and were amazing warm out of the oven with milk. It took me back to grade school.
The only complaint was from a few days latter: I took some of my muffins home for a taste test and the verdict was that they were good, but a little dry. Oh well, you can't win 'em all.
Peanut Butter and Jelly Muffins
makes 12 regular muffins, or 24 mini-muffins
You will need:
non-stick cooking spray
1/2 c creamy peanut butter
1/2 c carrot puree (You could prob substitute applesauce here)
1/2 c firmly packed brown sugar
2 T butter or margarine
1/2 c nonfat plain yogurt
1 large egg
1 c all-purpose flour
1 t baking powder
1 t baking soda
1/2 t salt
1/2 c jelly or preserves (grape, strawberry, etc)
1. Preheat the oven to 350*. Coat a 12 cup muffin tin w/ cooking spray, or line w/ paper cups
2. In a large bowl, beat the peanut butter, carrot puree, sugar, and margarine/butter with a sturdy spoon until well combined. Stir in the yogurt and egg.
3. Add the flour, baking powder, soda, and salt. Stir until just combined, but do not over mix - there should be some lumps in the batter.
4. Divide the batter among the muffin cups and drop a spoonful of preserves or jelly on top of each.
5. Bake until the tops of the muffins are lightly browned and a toothpick comes out clean when inserted in the center, 20 - 25 minutes. Turn the muffins out onto a rack to cool.
6. Store in an airtight container at room temp. for up to 2 days, or wrap individually and freeze for up to 1 month.
From "Deceptively Delicious" by Jessica Seinfeld.
* I put my muffin mold on a tinfoil lined baking sheet to catch any drips.
Subscribe to:
Posts (Atom)