adapted from "Mastering the Art of French Cooking"
Pate Brisee
Short Paste, Pastry Dough, Pie Crust
2 cups all-purpose flour
1 tsp salt
1/4 tsp sugar
6 ounces (1 1/2 stick)chilled butter, cut into bits
4 Tbsp chilled shortening
scant 1/2 cup iced or really cold water, plus more as needed.
I would recommend having all the ingredients ready before mixing by hand, including the water, so as to avoid having to wash your hands repeatedly, or getting flour all over your kitchen.
"Place flour, salt, sugar, butter and vegetable shortening in a big mixing bowl. Rub the flour and fat together rapidly between the tips of your fingers until the fat is broken into pieces the size of oatmeal flakes. Do not overdo this step as the fat will be blended more thoroughly later"
When blending the flour and butter together it maybe helpful to look for a wet sand kind of texture to the flour. Its ready for the next step when you can squeeze some of the dough in your hand and it stays in a clump when you release it.
"Add the water and blend quickly with one hand, fingers held together and slightly cupped, as you rapidly gather the sough into a mass. Sprinkle up to 1 tablespoon more water by droplets over any un-massed remains and add them to the main body of the sough. Then press the sough firmly into a roughly shaped ball. It should just hold together and be pliable, but not sticky."
If you do happen to add to much water, you can add a bit more flour to the dough ball in the next step called fraisage, or final blending.
"Place the dough on a lightly floured pastry board. With the heel of one hand, not the balm which is too warm, rapidly press the pastry by two-spoonful bits down on the board and away from you in a firm, quick smear of about 6 inches." Basically you are making sure the butter is well blended into the dough. Once the dough has been smooshed, gather it up into a mass and knead it briefly into a ball. Lightly flour the ball and wrap it up in plastic wrap or waxed paper. You can place the dough into the freezer for up to an hour until it is firm, or refrigerate for 2 hours, or overnight.
"Uncooked pastry dough will keep for 2 to 3 days under refrigeration, or may be frozen for several weeks. Always wrap it airtight in waxed paper and a plastic bag." (I imagine plastic wrap would be just fine)
Monday, March 28, 2011

What to do when you have too many eggs in your basket

I recently celebrated a special night and had my family and close friends over for a Pancake Supper for Fat Tuesday.
Fortunately there was a lot of great food and good fun had by all (and a lot of yummy leftovers to eat the rest of the week)
Unfortunately between purchasing eggs myself, getting another dozen from my Mom, and the roommate bringing home another dozen a few days later, we were left with quite the plethora of eggs in the refrigerator..
I decided to use them in such a way so they would be a little more appetizing than egg salad for a week: Quiche.
I have recently acquired a copy of "Mastering the Art of French Cooking" by the esteemed Miss Julia Child, Louisette Bertholle, and Simone Beck. I've perused a few pages and it seems to be a comprehensive and extremely well written culinary tome.
I based my quiche making on the recipe for Quiche aux Epinards with only a few changes. I made my quiche in a square baking dish instead of a tart pan or round pie plate. Instead of blanching the spinach, I sauteed mine in a large pan in olive oil. I also sauteed some diced mushrooms to add in as well. Lastly I used Mozzarella cheese instead of Swiss cheese.
You could probably get away with a store bought pie crust or use a roll of biscuits, re-rolled into a round and placed in the pan as a crust. If you can't get the biscuit dough to roll out thinly, let it come to room temperature and then press into the corners of your pan. Remember to poke holes in the bottom with a fork so the crust won't puff too much then pre-bake the crust slightly; 8 - 10 minutes in a 375* oven should do the trick.
Spinach and Mushroom Quiche
8 inch partially cooked pastry shell (recipe to follow)
5 Tbsp olive oil
1/2 container of sliced mushrooms
1/4 large onion, diced
1/2 16 oz bag of fresh spinach
1/4 large onion, sliced
4 to 6 cloves garlic, lightly smashed
salt and cracked black pepper, to taste
Pinch of nutmeg
3 eggs
1 1/2 cup milk
1/2 cup grated Mozzarella cheese
If you are making your own pie crust, assemble the dough and let chill in the freezer for about an hour while you prep the rest of the ingredients.
Heat up about 2 Tbsp of olive oil in a large saute pan. Drop 2 or 3 of the lightly smashed garlic cloves in the oil. They should still be in large chunks, big enough to pull out with tongs later, once they have flavored the oil.
Dice 1/4 of the large onion and add to the hot oil. Saute the onions until they soften and start to become translucent. While the onions are cooking, quickly dice up the sliced mushrooms and add those to the pan as well.
Saute the mushrooms, stirring often, until they have released their juices and have started to brown up. This can take about 8 - 10 minutes. Once the mushrooms have browned, season them to taste with salt and pepper, cook a few moments more, then spoon them into a bowl and set aside. Pull out the chunks of garlic clove and discard.
In the same pan, pour in another 2 - 3 Tbsp of olive oil and another 2-3 cloves of smashed garlic. Slice the onion quarter this time and add those to the oil to saute until softened and slightly translucent. Go ahead and pull the garlic gloves now so they don't become lost in the spinach.

Start adding the spinach in handfuls. It will look like a lot, but the leaves will start to wilt down. Add the spinach in batches if they don't all fit into the saute pan at once. Stir often so the unwitled pieces can get closer to the heat. It should only take a few minutes for all of the leaves to wilt down. You don't want to over cook them; they should look bright green.
Season to taste with salt and pepper and set aside to cool slightly. While the mushrooms and spinach cool, start making the egg portion of the quiche.
Beat the 3 eggs, milk and a pinch of nutmeg in a large bowl to blend. Gradually stir the mushrooms and spinach into the egg mixture. Add 1/4 cup of the Mozzarella cheese and stir to blend. Set the mixture aside while you finish the crust.
Preheat the oven to 375*
Take the ball of dough out of the freezer and roll out on a floured counter or board. Work quickly so you don't over soften the butter in the dough. Knead the ball a few times to soften, then using a rolling pin, roll the dough into about a 1/8 inch thickness. Turn the dough and re-flour the board as necessary so the dough doesn't become sticky.

Once the pastry has reached the desired thickness carefully transfer the round to your baking dish. Trim any overhanging edges and pinch the dough about 1/8 inch above the rim of the baking dish, to make a even ridge of dough around the edges. Poke holes in the bottom of the pastry dough and pre-bake it for 8 -10 minutes, or until it starts to brown. To keep the dough from puffing up too much, layer a piece of tin foil on top of the dough and either sandwich another similar shaped dish on top, or poor in some dried beans or rice. This is also called blind baking.
After the crust is ready, carefully pour the quiche mixture into the prepared pastry shell; it should come about 3/4 up the sides. Sprinkle the rest of the Mozzarella cheese across the top and place the quiche in the middle of the center rack and bake for another 30 - 35 minutes. The quiche is done when a knife plunged into the center comes out clean.
Julia says that the quiche "will stay puffed for about 10 minutes in the turned-off oven with the door ajar. As it cools, it sinks down. It may be reheated, but will not puff again. A cold quiche makes a good snack and is easy to take along on a picnic."
Here is the recipie for the pie crust
Wednesday, October 6, 2010
Fall and a Few of My Favorite Things

I am a big fan of when the seasons change. There's just something wonderful about witnessing nature in motion, the shift from one mode to the next. Shifting gears into fall is especially wonderful. I love the way it smells when the leaves start to change and then fall. I love the crisp cool air and snuggling up in a broken in hoodie. I love all of the harvest fruits and veggies: crisp sweet apples, round pumpkins and warm butternut squash. I certainly love the holidays that come with the season, particularly Halloween, and then Thanksgiving.
One of my other favorite things is making soup. Its the perfect cool weather food. It always seems so warm and inviting, often invigorating, and just darn tasty.
I have been craving some Cheddar Broccoli Soup, from Panera Bread, but since there isn't one close by I made this version from scratch. Its less cheesy and has more of a focus on the broccoli, but I'm OK with that.
Cheddar Broccoli Soup
4 Tbsp Butter
1 1/2 cup Celery, diced
1 cup Onion, diced (about one large onion)
3 cup Yukon Gold Potatoes, diced
1 1/2 lb Broccoli, chopped
2 Tbsp Flour
4 Cups vegetable stock
2 cups Cheddar cheese, shredded
1 cup Half and Half or Cream

Start by melting the butter in the bottom of a large pot over medium low heat. Add the celery and onion and saute until tender and translucent. Stir in the potatoes and broccoli pieces and cover and cook over medium heat for about 5 minutes, stirring often. Stir in the vegetable stock and turn up the temp to medium high and bring to a simmer. Cover and simmer for about 25 - 30 minutes or until the broccoli and potato pieces are tender. Turn the heat back down to low.
At this point is where you would want to puree the soup if you like yours creamy. A food processor or blender should do the trick, just be extra careful because it is hot! Ladle the broccoli and potatoes into your device of choice, making sure there is plenty of liquids as well. Pulse the mixture a few times to get it going, then puree until smooth. if it seems to thick, add more liquid. Watch out for steam when you open the lid. I usually puree about half of the soup so that there are still some small chunks of broccoli and potato still in the soup, enough so that you can tell what is in it.
Pour the puree back into the pot and re-warm to an almost simmer. If the soup is too hot when you add the cheese, the cheese could separate and become very unpleasant. That said, add the shredded cheese, one small handful at a time, stirring after each addition. Don't add the next handful until the cheese is completely melted in. Once the cheese has been incorporated stir in the half and half until smooth and lovely.
And that's it! Garnish with some more shredded cheese and serve with garlic toast.

N.B. I usually use fresh broccoli florets or crowns, which you can find in the produce section of your local grocery store, but a bag of frozen broccoli florets would be a good alternative if your fresh broccoli isn't so fresh. Just thaw first and add to the pot after the potatoes have been simmering for a good 10 to 20 minutes, as the frozen broccoli will cook quicker.
Sunday, August 1, 2010
Ratatouille - Summer Veggies with an Old World Attitude

If you have an overabundance of summer vegetables coming from your home garden, or like myself, are a bit overzealous in the produce department of your local grocery store, Ratatouille is a good way to put those vegetables to good use. Traditionally it is a combination of tomatoes, eggplant, zucchini, bell peppers, and onions and garlic for flavor. It can be seasoned with bay and or thyme, or herbs De Provence. There are about as many ways to make it as there are people who make it, ranging from a simple saute of all the vegetables together to a more complex layering approach, in which the eggplant and zucchini are sauteed separately and the other components are made into a sauce. The sauteed vegetables are then layered in a casserole dish with the sauce in between and baked.
I chose a simple approach this time around by using my trusty slow cooker to do all the hot, hard work. Instead of sauteing the vegetables I layered them in and set it to high. Using the slow cooker is convenient because there is no constant baby sitting at the stove and it doesn't unnecessarily heat up the kitchen. A win/win scenario for a simple summer dinner.
Ratatouille a la Slow Cooker
2 Tbsp Extra Virgin Olive Oil
1 medium onion, diced
3 to 4 cloves garlic, minced
1 small eggplant, thinly sliced (about 1 - 2 cups)
2 small zucchini, thinly sliced (about 1 - 2 cups)
1 bell pepper, diced
6 - 8 plum tomatoes, sliced (about 1 cup)*
Parsley, chopped
Salt and Pepper to taste
Pour in enough olive oil to coat the bottom of your crock pot. Dice or slice your vegetables and add them in layers to the pot. The sliced vegetables should be uniform in size and shape so that they cook evenly. Add a handful of parsley, chopped and season with salt and pepper to taste. Give a quick stir and cover. Cook on the high setting for at least an hour, or until the vegetables are tender, stirring occasionally. There should be enough moisture in the vegetables to roast them with out burning, but if they look try, add a little bit of water, vegetable stock, or maybe even some white wine.
* In the non-summer season when quality fresh tomatoes cannot be found, substitute one small can of low salt diced tomatoes for the fresh ones.

My presentation of the Ratatouille is accompanied by a pan seared Talapia fillet, sauteed in butter, with a red wine reduction poured over top. Yum!
Cool as a Cucumber Soup

During the three month heat wave we Marylanders call a typical summer, I do my best not to produce extra heat in the kitchen. Sweating over the stove is just not necessary to produce a delicious, healthy meal.
The proverbially cool cucumber lends itself to many a tempting dish, mostly of the salad variety. They are easy to prep and can be eaten raw, turning hard labor in the kitchen to a cool breeze, followed by a refreshing payoff at dinner.
Some of my favorite cucumber preparations for salad are simple. They can be served sliced with some diced onion and a apple cider vinaigrette for and amazingly simple side salad. Careful cutting and scooping can yield cucumber cups, in which to serve other salads such as chicken, tuna, or pasta salads. Even when they are julienned and served with a hummus or ranch style dipping sauce, cucumbers shine.
Cold soups are an avenue taken by the adventurous gourmands. Whenever I ask my friends and family if they would try certain things, a cold soup idea is usually met with hearty dose of skepticism. But do not fear the cold soup! Just as hot soups and stews are heartwarming home cooked meals in the winter, a cold soup can serve as a cooling entree to combat the heat of a summer day.
My Cool as a Cucumber Soup has lots of flavor and is quite easy to prepare, especially with a food processor. I made the original with a low tech box grater, but the outcome was still delightfully green and delish.
Cool as a Cucumber Soup with Parmesan Toast
2 to 4 Tbsp Extra Virgin Olive Oil
2 to 3 cloves of Garlic, grated
4 medium Cucumbers, seeded and grated with the skin on
3 scallions, thinly sliced
1 large container plain low fat or no fat yogurt
Cilantro, finely chopped
Zest and juice of 1 Lime
Salt and Pepper to taste.
1 loaf Italian bread, sliced on a diagonal
2 to 4 Tbsp Extra Virgin Olive Oil
1/4 to a 1/2 cup crumbled Parmesan Cheese
This soup is a chop and drop type of one bowl meal. Start with the Extra Virgin Olive Oil in the bottom of your serving bowl.
Grate in the garlic. Slice the cuckes in half and remove the seeds with a spoon. Grate the cucumber halves over a cutting board before sliding them into the bowl. I left the skins on to add color. Save the ends for a garnish: trim of the bumpy edge left by the grater and using your (sharp) chef's knife, thinly slice the ends into half moons. Put the half moons in a small bowl and set aside.
Rinse and slice the scallions and a handful of cilantro and add to the bowl along with the zest and juice of one lime. Stir in the container of plain yogurt. Season to taste with Salt and Pepper.
The resulting soup is a bit thick and can be thinned with vegetable stock if necessary.
If you are using a food processor to prepare, you won't need the grater. Start with the olive oil in the processor bowl. Peel the garlic cloves and puree those until they are finely chopped. Slice the cucumbers in half and scoop out the seeds, as above. Chop the cucumber halves into 1 or 2 inch pieces and give them a whir, along with the scallions, and add the remaining ingredients, as above. You may have to pour out the vegetable mixture into your serving bowl before adding the yogurt, depending on the size of you processor. The resulting soup should be quite smoother than the grated version.
Fan out a few of the saved half moon slices on top of each bowl and serve with some Parmesan toast. Parmesan toast is a variation on the garlic toast I made with the gazpacho however, there is a lot of garlic flavor already in the cucumber soup. Parmesan cheese counters this with a salty mellow flavor.
Toast the sliced bread with a little drizzle of Olive oil and instead of rubbing the slices with a garlic clove, sprinkle on a little bit a Parmesan cheese.
Tuesday, June 29, 2010
Mexican Gazpacho
With this relative heat wave we have been experiencing so early this summer, I wanted to whip up something cool and delicious for dinner. This Gazpacho has a slight Latin twist with the roasted corn and chili powder flavors. If you like tomatoes you are sure to love this cold soup. It only gets better the longer the ingredients meld in the fridge, if you are lucky enough to have leftovers that is!
Mexican Gazpacho
4 large ears of Corn On The Cob, Sweet
1 large Yellow Bell Pepper
1 large Green Bell Pepper
1 large Red Bell Pepper
1 loaf Artisan French Bread
20 oz Canned Tomatoes, Petite Diced
20 oz Canned Tomato Sauce
1 cup Button Mushrooms
1 medium Onion, Sweet
3 cloves Fresh Garlic
2 tsp Ground Cumin
1 tbsp Chili Powder
1 cup Vegetable Stock (natural, Cooking)
3 tbsp Balsamic Vinegar
7 tbsp Extra Virgin Olive Oil
Start with the Corn on the Cob:
Pre-heat the oven to 450 degrees. Husk each ear, being sure to remove all of the silk as well. Place the ears in a baking dish and coat with 2 Tbsp of the Olive Oil. season the ears with a little of the Cumin and Chili Powder and Salt and Pepper to taste.
Roast in the oven for 15 - 20 minutes until the ears are fork tender. Pull the ears out and let cool.
Meanwhile char the Bell Peppers. This can be done directly over a low flame of a gas stove. Keep rotating the peppers with tongs until most of their skins have blackened and the flesh is partly cooked through. When the skins are almost completely charred, remove the peppers to a large bowl and cover with plastic wrap. Allow the peppers to rest in the covered bowl for 10 - 15 minutes. The steam released by the charred peppers will help soften the skins.
Slice the French Break into thick slices (8 - 10) Place on a baking sheet, and drizzle with some of the Olive Oil. Toast in the hot oven after the corn has come out, up to 5 minutes. Be careful not to burn the bread!
Open the cans of Tomatoes and pour into a large bowl. Dice the Mushrooms, and Onions and drop into the bowl. Grate in 2 cloves of the garlic, saving on clove for the toast.
When the Corn is cool enough to touch slice off the kernels. A good trick is to place a small bowl upside down inside of a larger bowl. Use the small bowl as a platform for the cob and carefully slice off the kernels into the large bowl. Dump them into the tomato mixture in the large bowl.
When the peppers have rested remove from the bowl. The charred skin will be soft enough to remove with a kitchen towel. Just rub the skins off. Cut the flesh away from the cores, remove any seed and dice. Add the diced peppers to the tomato mixture.
Stir everything together - season with the remaining Cumin, Chili Powder, Balsamic Vinegar, and 2 Tbsp of the Olive Oil. If the mixture is to thick, thin with 1/2 - 1 cup of the vegetable stock.
To finish the toast, rub the last garlic clove over each slice of the toasted bread.
Allow the soup to chill. Serve with a slice of garlic toast and enjoy!
Mexican Gazpacho
4 large ears of Corn On The Cob, Sweet
1 large Yellow Bell Pepper
1 large Green Bell Pepper
1 large Red Bell Pepper
1 loaf Artisan French Bread
20 oz Canned Tomatoes, Petite Diced
20 oz Canned Tomato Sauce
1 cup Button Mushrooms
1 medium Onion, Sweet
3 cloves Fresh Garlic
2 tsp Ground Cumin
1 tbsp Chili Powder
1 cup Vegetable Stock (natural, Cooking)
3 tbsp Balsamic Vinegar
7 tbsp Extra Virgin Olive Oil
Start with the Corn on the Cob:
Pre-heat the oven to 450 degrees. Husk each ear, being sure to remove all of the silk as well. Place the ears in a baking dish and coat with 2 Tbsp of the Olive Oil. season the ears with a little of the Cumin and Chili Powder and Salt and Pepper to taste.
Roast in the oven for 15 - 20 minutes until the ears are fork tender. Pull the ears out and let cool.
Meanwhile char the Bell Peppers. This can be done directly over a low flame of a gas stove. Keep rotating the peppers with tongs until most of their skins have blackened and the flesh is partly cooked through. When the skins are almost completely charred, remove the peppers to a large bowl and cover with plastic wrap. Allow the peppers to rest in the covered bowl for 10 - 15 minutes. The steam released by the charred peppers will help soften the skins.
Slice the French Break into thick slices (8 - 10) Place on a baking sheet, and drizzle with some of the Olive Oil. Toast in the hot oven after the corn has come out, up to 5 minutes. Be careful not to burn the bread!
Open the cans of Tomatoes and pour into a large bowl. Dice the Mushrooms, and Onions and drop into the bowl. Grate in 2 cloves of the garlic, saving on clove for the toast.
When the Corn is cool enough to touch slice off the kernels. A good trick is to place a small bowl upside down inside of a larger bowl. Use the small bowl as a platform for the cob and carefully slice off the kernels into the large bowl. Dump them into the tomato mixture in the large bowl.
When the peppers have rested remove from the bowl. The charred skin will be soft enough to remove with a kitchen towel. Just rub the skins off. Cut the flesh away from the cores, remove any seed and dice. Add the diced peppers to the tomato mixture.
Stir everything together - season with the remaining Cumin, Chili Powder, Balsamic Vinegar, and 2 Tbsp of the Olive Oil. If the mixture is to thick, thin with 1/2 - 1 cup of the vegetable stock.
To finish the toast, rub the last garlic clove over each slice of the toasted bread.
Allow the soup to chill. Serve with a slice of garlic toast and enjoy!
Tuesday, June 15, 2010
Domestic House of Waffles
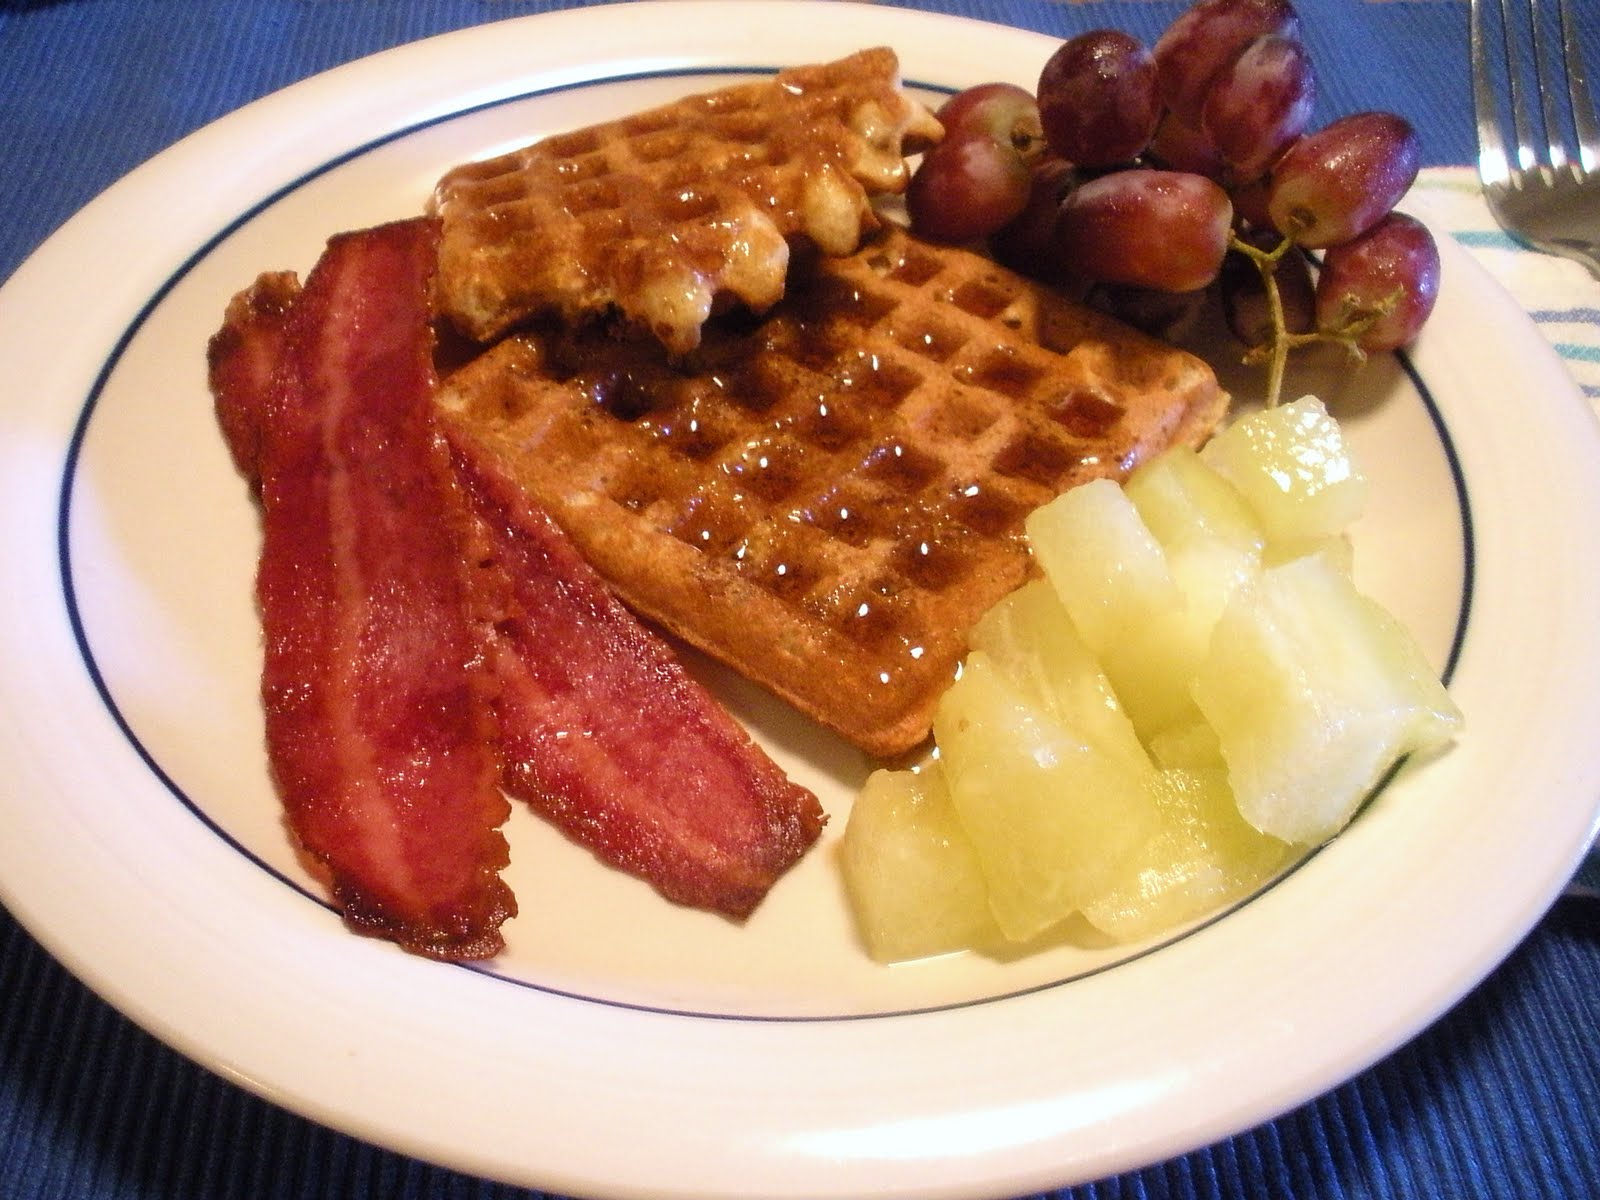
One thing I miss about not living at home, is the big Sunday breakfasts we used to have after church.
There was usually eggs, bacon or sausage, toast, potatoes, steamed onion, maybe some pancakes or french toast, fruit, and if we were lucky, cinnamon buns. Yummm. This was the kind of meal that lead to early afternoon naps before the sports began on T.V.
In that frame of mind I decided to make some waffles, from scratch of course!
Whole Wheat Waffles
1 cup Whole Wheat Flour
3/4 cup All Purpose Flour
1 tbsp Baking Powder
1 tbsp Sugar
1/2 tsp Salt
3 Eggs
1/4 c to 1 cup Butter, melted
1 1/2 cups Milk
Preheat your waffle iron.
Whisk flours, baking powder, sugar and salt together in a large bowl.
Blend the eggs, melted butter and milk thoroughly in another bowl. For a lighter waffle use only 4 tbsp of butter (1/2 stick). To make an extra crispy waffle go for all of the 1 cup of butter (2 sticks). For a good in between waffle stick to the 1/2 cup amount (1 stick).
Make a well in the center of the dry ingredients and pour in the wet ingredients. Combine with a few quick strokes of the whisk. Don't over mix the batter or your waffles will come out tough.
If you want to add any additions (like fruit, chocolate chips, etc) now would be the time.
To cook, pour about a 1/2 cup to 1 cup of batter onto the center of the bottom plate of the iron, so that its about 2/3 covered. There's no need to grease the iron because of all of the butter in the batter.
Close up the iron and watch and wait. Let the waffle cook for about 4 minutes. The waffle will be ready when the steam stops escaping from the side of the iron. If the iron seams difficult to open, the waffle probably isn't quite ready, let it cook for a minute more and try again.
Serve warm with some maple syrup for a traditional breakfast treat.

Left overs can be frozen individually in a freezer bag and thawed later for a quick treat. I like to put the frozen waffles directly into the toaster, then slather them with peanut-butter and jelly for a breakfast sandwich on the go.
Subscribe to:
Posts (Atom)